Archives for category: Pakistani

IMG_2793

I am a clean freak.  Honestly, I have a problem.  I cannot tolerate any dishes in the sink, any sort of mess.  I get grossed out way too easily.  It’s funny because as I’m getting older the less tolerance I have for uncleanliness.  The reason I mention this is because it is getting increasingly difficult for me to eat street food.  My husband and I went to Thailand and I couldn’t bring myself to eat ANY of the street food.  I look at photos of Thai street food and it looks so delicious.  But in the moment I failed myself!  This is such a pity because I love street food and hole in the wall places wherever they are in the world (as long as they are clean).

IMG_2715

IMG_2808

In Toronto we have a small section of the city called Little India.  I have not been too much, because Pakistani or Indian food is something I can eat at home.  But there is a whole experience to going and sitting on a plastic chair or a picnic table and eating foods like papri chaat, gol guppay, tikkas, and naan.  My husband and I ventured to Little India to get some chaat a few years ago and I really think we went on a bad day because the places we found were not very good.  I’ve heard good things from friends about some places there so I don’t want to be a meanie and bash any place in particular.  🙂

IMG_2723

IMG_2765

After that trip, I decided to make chaat at home.  The ingredients are readily available and it’s actually quite easy to make.  I’ve also made chaat at my inlaws’ house many times when they have guests over and not to boast, but it’s always a hit. I like to make it fresh (otherwise it gets soggy) so I make it in batches and people have no patience to wait for me to finish the next tray of chaat.  While I am making a new batch they start reaching into the serving dish.  In situations like this I just zip my lips. But despite this slight annoyance I should take this as a compliment.  My chaat is just THAT delicious.  😉
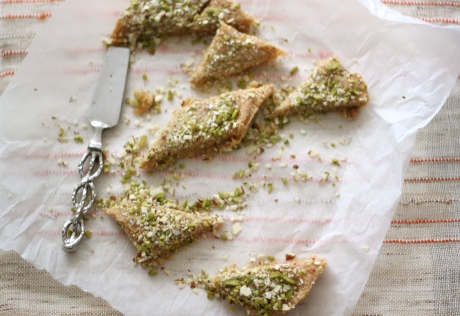
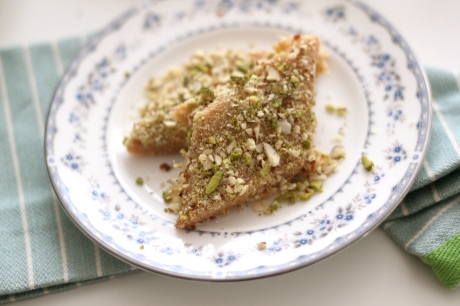
IMG_2804Papri Chaat

Ingredients

(this is a loose recipe and can be adapted to your taste)

Papri (can be found in South Asian grocery stores)

Bhel Puri (can be found in South Asian grocery stores)

1 cup cooked chickpeas

boiled potato, peeled and cut into small cubes, about 1 cup

Tamarind Chutney*

Green Chutney**

Yogurt***

Chaat Masala (can be found in South Asian grocery stores)

chopped red onions

chopped tomatoes, optional

chopped green chilies

chopped cilantro

chopped mint, optional

Method

*Tamarind Chutney is made by heating 3/4 cup of tamarind pulp, 6 pitted Medjool dates, 2 tablespoons chaat masala, 1/2 teaspoon cumin powder, 1 teaspoon red chilli powder (or to taste), 3/4 teaspoon, 1/4 cup sugar on medium heat for 15 minutes and then reducing the heat to low for 45 minutes.  Allow it to cool and then blend in a blender until the consistency is smooth.  Serve chilled.

**Green Chutney is made by placing 1 cup cilantro leaves and stems, 15 mint leaves, 1 long green chilli, 2 tablespoons water, salt, and black pepper in a blender until very finely chopped.  This should resemble a pesto.

***For the Yogurt, take 1 cup of plain yogurt and thin it out with 1/2 cup of water.  Add 1 teaspoon chaat masala and salt to taste.  Whisk until it looks like thick cream.

To assemble the chaat:  Place the papri (wafers) on a serving dish and top with chickpeas, potatoes, yogurt, tamarind chutney, green chutney, red onion, cilantro, chopped tomatoes, mint, green chilies, and sprinkle the dish with chaat masala.  Finally, top with some bhel puri.  It is best to serve this right away.  You can prepare everything in advance and assemble before serving.

IMG_0766

I realized I don’t bake very much anymore.  I don’t know how this happened.  Several nights a week after dinner I scour through my cookbooks and online to find something to bake.  I always feel like eating something sweet after dinner and trying to satisfy my sweet tooth with fruit is essentially fruitless (hehe).  But after dinner I want quick satisfaction, so I head over to the cupboard and snack on a few chocolate chips.

IMG_0644

IMG_0667

IMG_0682

I want to bake marvelous cakes and pastries.  I could look at baking recipes for hours, but when it comes down to the actual execution I’m always hesitant.  I think it has something to do with me the fact that me baking always yields a tornado-like scene in my kitchen.  I have enough counter space and yet without fail I manage to make a huge mess to cleanup and that leaves me feeling bitter.  But of course if my baking project comes out as planned, I guess the tornado-scene is just the collateral damage to an otherwise successful (and delicious!) feat.

IMG_0717

IMG_0734

Back to my laziness, these vermicelli squares are a godsend for the ultimate lazy sweet satisfaction seeker like myself.  It’s an easy recipe with just a handful of ingredients and not too many bowls and most importantly — no flour dust storms in the kitchen.  It also looks like you spent hours making it, when in actuality these squares require no effort at all.  My sister-in-law makes these and I never saw them before she made them one day.  At first I thought they were some sort of baklava, but they’re just Pakistani vermicelli with sweetened condensed milk, cardamom, butter, and nuts.  When she told me the recipe, I was shocked that it wasn’t something more complicated.  Either way, it’s a win-win situation and those post-dinner sweet cravings will be thoroughly satisfied with these sticky and sweet squares.

IMG_0723

IMG_0736

IMG_0793

Sweet and Sticky Vermicelli Squares (or Diamonds!)

Makes an 8″x 8″ pan

Ingredients

4 tablespoons butter (unsalted or salted, doesn’t matter)

1 packet (about 200 grams) of Pakistani or Indian Vermicelli (found in Pakistani or Indian grocery stores)

1 (scant 2 cups) can of sweetened condensed milk

1 cup milk

2 cardamom pods, seeds removed and crushed slightly in a mortar and pestle

pinch of salt

1/2 cup crushed almonds and pistachios, you can add more or less

Method

Grease an 8″ x 8″ baking dish and line it with parchment paper.

Heat a large pot on medium heat and add the butter and allow it to almost get to the brown stage (about 2-3 minutes).  Watch the butter closely because you don’t want it to burn.  Add in the cardamom seeds.  Next, tear the vermicelli into the butter and cardamom and allow the vermicelli to toast a little.  Keep stirring until the vermicelli begins to soften.  Add in a 1 cup of milk and let the milk evaporate, stirring constantly.  Pour in the sweetened condensed milk and lower the heat to medium low.  Mix in the sweetened condensed mik, until combined and keep stirring occasionally until the vermicelli is soft, but still has a little bit of a bite to it, about 20-30 minutes.  Allow the vermicelli to cool for 5 minutes.

Next, transfer the vermicelli to the 8″ x 8″ baking dish and press it down with a spoon, so that it is evenly pressed into the baking dish.  Press in the nuts over the vermicelli and leave it at room temperature for an hour or two.  Put out the parchment paper and cut the vermicelli into squares or diamonds.  Serve at room temperature.

Things are hectic lately.  We’re about to move, which is always a stressful time. Yes, finally, I am moving to a big city, Toronto. My husband used to live there, so it won’t be too hard adjusting.  Despite all my complaining about where I live now, I am going to miss it.  My apartment feels so homey, anyone who visits says the same thing.  I’m getting sentimental about leaving.  There are so many things I’m going to miss, which I will post about later.

This was the first city my husband and I lived in together, where we moved past the newlywed stage of marriage and have come into our own.  We have our own routine here, it’s not the most exciting life or in any way cosmopolitan, but we managed.  But there’s always a time to move on, I guess.  I don’t want to sound like a downer, I am very happy we’re moving.  I’m just the type of person who gets attached to places.  I lived in the same house until I was 21.

Anyhow, my main point was that things are hectic around here.  When things are hectic, shami kebabs are a lifesaver, emergency food, if you will. They freeze so well and last for months.  I must admit, the process of making them is somewhat grueling, but it’s not so bad.  I try to always have them on hand because it never hurts to serve an extra dish, especially for a last-minute gathering.

I am smiling right now, thinking about in Pakistan there are always unexpected guests, an occasion where shami kebabs come in very handy.  This concept would not really fly in North America, people showing up unannounced and expecting to be served something substantial to eat. Someone usually has to rush to the local bakery to get samosas, various biscuits, and puff pastry patties.  Then, all the food is placed on a special trolley for guests and then it is rolled out with a teapot covered in a tea cozy and all the bakery goodies.  Meanwhile, shami kebabs are frying up in the kitchen because they are ready in the freezer.

Whether or not you eat shami kebabs as an emergency food, they are delicious and one of my all-time favorites.  Since we’re going to be moving and there will be little time to cook, we’ll be eating a lot of shami kebabs.  All the hard work is worth it, trust me.

Chicken Shami Kebabs

Makes about 25-30 kebabs

Ingredients

for cooking the chicken:

water, as needed

2 1/2 pounds boneless chicken thighs, in large chunks*

1 medium sized red onion, roughly sliced, no need to be precise, just in chunks

half a bulb of garlic, peeled

2 inch piece of ginger, roughly chopped

1 cup yellow split pea lentils (chanay ki dal) soaked overnight and washed

2 teaspoons coriander seeds

2 teaspoons cumin seeds

1 teaspoon black peppercorns

1/2 teaspoon whole cloves

3 black cardamoms

5 green cardamoms

10-12 dried red chilies, use less for less spicy

1 cinnamon stick, broken in half

2 bay leaves

salt, to taste

after cooking the chicken you will need:

1 cup chopped cilantro

1/2 cup chopped mint

2-3 green chilies, chopped

1/2 a red onion, chopped

4 scallions, white and light green parts, chopped

2 eggs

oil for frying

Method

First, cook the yellow lentils in plenty of boiling water until soft, after 30-45 minutes.  Set aside.

In a large pan, add the chicken, a little oil (if necessary), and all of the items listed (including spices) under the “for cooking the chicken” ingredients.   Also, add a little water, about 1/2 a cup.  Cook the chicken on medium heat for 15 minutes and then turn the heat to medium low and continue cooking for 45 more minutes, or until the chicken is very tender and all the water has evaporated.  You may need to add more water to the pot if it evaporates too quickly, just make sure you cook until the chicken is tender and the onion, garlic, and ginger are very soft.  Remove the cinnamon stick, black cardamom, and bay leaves, all the other spices will grind in the food processor.

Once the chicken is cooled, allow it to cool for 15-20 minutes.  After it has cooled slightly, transfer it to a large food processor with the cooked lentils and pulse until they are combined. Transfer the chicken and lentil mixture to a large bowl and add in the chopped cilantro, mint, scallions, green chilies, and red onion.  It’s time to get messy and crack in the 2 eggs and mix it all together with your hands.  Once everything is combined, form the chicken into round kebabs, about 3 inches in diameter.  You should end up with about 25-30 kebabs.

Next, in a frying pan heat some oil on medium heat and fry the kebabs until browned on both sides, about 3 minutes per side.  Cook as many as you want and you can freeze the kebabs that are not fried for up to 3-4 months.

Variation: Instead of adding the egg inside the kebab mixture, before frying you can dip each kebab into beaten egg and fry the kebabs with an egg coating.  Another slight variation, is that you can grind all the spices that you cook with the chicken i.e. before adding them to the pot grind them all in a spice grinder and cook the chicken with the ground spices.  However,  I just grind them in the food processor with the chicken after it has cooked, removing the black cardamom, cinnamon stick, and, bay leaves.  I find that the other spices grind easily, as they have become soft after cooking.  It’s a personal preference.

To reheat frozen shami kebabs: leave frozen kebabs out at room temperature for 30 minutes and fry as usual.

You can serve the shami kebabs as a snack or a side dish with green chutney /chili garlic sauce or with dal and basmati rice.  I also like to eat them with parathas.  A popular street food in Pakistan is bun kebab, which is also made with shami kebabs.

*I usually use beef stewing meat, which you can use, just cook the yellow lentils with the beef rather than separately and adjust the cooking time and water according to the meat you use.  Beef will take longer.  I used chicken thighs here because I had some in my freezer.  I imagine you could also use chicken breast as well.  Some people also cook the meat and lentils in a pressure cooker, but I don’t have one so I can’t give instructions on that method.

Shami Kebab recipes on other sites:

Chachi’s Kitchen

Passionate About Baking

Journey Kitchen

Fauzia’s Pakistani Recipes

Epicurious

This is definitely not a Valentine’s Day dish.  It’s not special and it’s completely and utterly pedestrian, at least in Pakistani households.  Regardless, I wanted to share it with you today because it’s the first dish I ever cooked for my husband.  Way back when, five years ago, in April, I met my husband through my sister.  She met him and put him in touch with me, he was in grad school in Toronto and I was in grad school in Montreal and in my sister’s mind that was enough reason for us to get along.  We started talking and then one day on a whim he decided to visit me in Montreal.  As you can imagine, I was nervous.  In our conversations I told him I enjoyed cooking, though at the time I didn’t do much being a busy grad student.  So when he arrived and when we got over the initial awkwardness we both went grocery shopping together.

It’s not exactly the first date most of us imagine, but that is what happened with us.  The premise of the grocery shopping was that I would cook lunch for us.  I had no clue what to make, we were wandering through the aisles and I said that I would make keema (ground beef).  It was a dish I was comfortable making and my now husband was pretty laid back about the whole thing.  He told me he liked it with green bell peppers, in my mind I thought, “ew,” but I put some green bell peppers into our cart and also picked up some spinach to  make aloo palak, a dish I had never made before.  Back then, I was polite and didn’t say anything about the bell peppers, if it was today, it would be an entirely different story.

We got back to my apartment and I started cooking in my tiny kitchen with very little proper kitchen equipment.  We began talking and pretty soon we were more comfortable and it felt as though we knew each other for ages.  I made the keema, aloo palak (it turned out good), basmati rice, salad, and chutney.  My husband stuck with me after that meal and it’s safe to say he was a fan of my cooking.  After eating lunch we explored Montreal, which in of itself is a very romantic city, and then later had some late night bites at a restaurant, a “proper” date, if you will.

My husband’s favorite Pakistani dish besides channay is keema. I don’t know if he liked it before or if his love for it blossomed after I made it that first time.  He now requests it on a weekly basis.  He was just away for three weeks on medical residency interviews and whenever he would get a few days in the middle to come home, he would ask me to make aloo keema. Luckily for me it’s an easy dish and I also enjoy it.

I know this isn’t a gorgeous Valentine’s dessert of gooey chocolate, but it is one of “our” dishes.  Since my husband and I consider food a big part of what we have in common, it doesn’t matter if it’s simple Pakistani home cooking or some form of haute cuisine, we always enjoy it in each other’s company.  Happy Valentine’s Day, everyone!

Aloo Keema

serves 3 as a main, 4 if served with a side dish

Ingredients

Canola oil, or any neutral vegetable oil

1 pound ground beef (chicken, lamb, goat) It’s also up to you if you want to use lean or not.  I like to wash and drain it in a colander.

1 red onion, thinly sliced into half moons

2 heaping tablespoons ginger-garlic paste (2 inch piece of ginger and 5-6 cloves of garlic blended together with a little water)

1 potato, peeled and cut into large chunks (you can also use peas, peppers, cauliflower, or any vegetable you choose, just adjust cooking times)

2 tomatoes, puréed (canned are alright, if they are out of season)

1 teaspoon roasted cumin powder

1 teaspoon coriander powder

1/4 teaspoon turmeric

1 teaspoon red chili powder/cayenne pepper, or to taste

1 teaspoon salt, or to taste

3-4 whole black peppercorns

2 cloves

2-3 green chilies, julienned, seeds removed if you like

nice handful of cilantro, chopped

3 scallions, chopped, optional

garam masala, optional

limes, for garnish, optional

Method

Heat a large saucepan on medium heat and add in some oil, to your taste.  Let the oil heat up and add the onions and fry them for a few minutes until they start to almost turn light golden brown.

Add in the meat and ginger-garlic paste and keep stirring it until the ground beef is all broken up and in very small pieces.  Once the meat is slightly browned add in all the spices except the garam masala and keep mixing until everything is combined and the rawness is cooked out the spices.

Next, add in the tomato purée and mix it into the meat.  I also add in half a cup of water at this point.  Lower the heat to medium low and cover the pan and allow it to cook for 15 minutes or so.

After fifteen minutes, check the meat and mix it.  Cover and let it cook for fifteen more minutes.  After fifteen minutes, add in the potatoes and mix everything together a few times.  You should no longer see individual pieces of onion (it should have melted into the “masala,” and the oil should start to separate from the meat.  If necessary, add a little water (1/4 cup) to help the potatoes cook.

Once the potatoes are cooked, add in the green chilies, cilantro, scallions, and a sprinkling of garam masala and cook for another few minutes.  Serve with rice, chapati/roti, or naan and green chutney, limes, spicy pickles (achaar), and salad.

*Leftovers taste even better!

I would like to wish everyone a very blessed Eid.  Eid is a time for family, friends, and celebrations and I hope all of you are fortunate enough to be close to your loved ones.  Usually, we eat meat that has been slaughtered in a ritual sacrifice.  We prepare dishes like yakhni pulao (meat stock based rice pilaf), kharay masalay ka gosht (meat cooked with whole garam masala pieces), karahi gosht (a tomato/chili based meat dish), and many more.  Unfortunately, this is not a vegetarian friendly holiday, I suppose it could be though.

However, meat is not the only focus.  Desserts are prepared in copious amounts.  Kheer (rice pudding), sewayyan (sweetened vermicelli), zarda sweetened rice) are part of the dessert spread.  Yes, we are very serious about food and prepare a feast even if it’s just for your immediate family.

One of my favorite Pakistani desserts is Shahi Tukray.  Let me tell you, it is literally heaven.  Fried bread slices soaked in a sugar syrup infused with saffron and cardamom and then dunked into a rich and creamy milk pudding, so good.  So, so good.  Usually, I don’t swoon like this for other Pakistani desserts, sure I like them, but for me, Shahi Tukray are on a completely other level.  It’s almost like you take a bite and you are so consumed in the utter deliciousness that you can’t think for a minute.  Or maybe I’m just an odd one and this is only the case for me.  Regardless, this dessert is befitting to its name, which means royal pieces or morsels.

I added a twist to the recipe here, being Autumn I thought pumpkin might work in this dish.  I added pumpkin purée to the rabri (reduced milk pudding) and the combination of pumpkin with cardamom, cinnamon, and cloves (the last two another nontraditional addition of mine) was divine.  Of course, if you want to stay true to the original leave the pumpkin out, but I really enjoyed this new combination.

Eid Mubarak and even if you don’t celebrate, find some Muslim friends and I’m sure they would be more than happy to include you in their celebrations and share the yummy food with you.

Shahi Tukray with Pumpkin

Serves 6-8

Ingredients

2 cups whole milk

1 cup half and half

1 cup canned pure pumpkin purée

2/3 cups plus 2 tablespoons sugar

3-4 whole cloves

1 teaspoon cardamom powder

5 cardamom pods

1 cinnamon stick

a nice pinch of saffron threads

1/3 cup water

1/4 cup canola oil or clarified butter, for frying (you might need slightly more oil/clarified butter, but I try to use as little as possible)

1 loaf (8-10 slices) day-old country-style white bread, crusts removed (optional) and cut into 2 pieces on the diagonal

edible silver leaf, for garnish (optional)

1/2 cup toasted and chopped mixed nuts-pistachios and almonds with skin, for garnish

fresh whipped cream, for garnish

cinnamon powder, for garnish

softened butter, for greasing the baking dish

Method

In a medium-sized saucepan on medium heat, bring the milk, half and half, cardamom powder, 2 cardamom pods, cinnamon stick, cloves, 2 tablespoons of sugar, and pumpkin to a simmer. Mix the ingredients every minute or so.

Once the milk/cream mixture comes to a simmer turn the heat to low and let the mixture thicken to the consistency of a loose pudding/custard. Keep stirring every few minutes so that the cream does not burn. This should take 35-45 minutes. Once the milk/cream mixture is done, remove the cinnamon stick, cloves, and cardamom pods.

While the milk/cream mixture is simmering, make the sugar syrup by combining the remaining sugar, water, saffron threads, and 3 cardamom pods in a small saucepan on medium-low heat. The syrup will be done once the sugar and water have dissolved into a uniform liquid after about 10 minutes. Leave the sugar syrup on low heat until the milk/cream mixture is done.

At this point preheat the oven to 400 degrees Fahrenheit and butter an 8″x8″ inch baking dish.

Once the cream mixture and sugar syrup are done, start frying the bread triangles in a fry pan on medium heat with the oil or clarified butter until all the pieces are golden brown on both sides. Lay the bread on paper towels to absorb the excess oil.

Once all the bread pieces are fried, dip each bread piece into the sugar syrup then into the milk/cream mixture so that the bread is coated well and then arrange the bread into the baking dish. I like to arrange the bread on the diagonal. Repeat this until you have used up all the fried bread.

Next, take any remaining milk/cream mixture and pour it over the bread slices in the pan and use a rubber spatula to make the top smooth.

Bake the bread slices in the oven for 15 minutes or until the top just starts to slightly turn golden.

Remove from the oven and garnish with the chopped nuts and silver leaf, if you are using it.

Serve with fresh whipped cream and a sprinkling of cinnamon, if you like. I like to eat it right from the oven but it can also be eaten at room temperature or even chilled.

*This can be made a day in advance and baked the day of serving.

I also posted this recipe on food52 here.

“You just want me to be fat and making parathas in the kitchen all day,” my mother would exclaim when my sister and I got into a little fight with her.  You see, when my sister and I were teenagers my mother would often wear the same sort of clothes we wore and we would become incredibly annoyed.  Maybe she was right in a way.  We did want her to do more baking and wear ugly sweaters like everyone else’s moms.  My mother always had a young spirit and had a young outer façade to match it.  My sister and I have since gotten over our teenage qualms and are happy to have our mom raid our closet and vice versa.

She saw making parathas and rotis as the ultimate form of subservience, the sign of an unhappy woman.  I know that it was a silly thing for her to think, regardless I developed the same sort of picture in my mind.  When I got married, my mom said to me, “there’s no need to make roti everyday.”  That was certainly not in my plan and I only attempted to make them two years after marriage.  This was because I was inspired by of all the fabulous bakers and adventurous bloggers I came into contact with.

In stark contrast to my own mother is my mother-in-law.  I only hinted at the prospect of trying to make rotis and she was back the same day with a tawa.  She made sure to buy me atta and proceed on giving me a lesson in the art of making rotis.  For indeed it is an acquired art, you can not master it at one go.  When I went back to my own home, my mother-in-law would call and ask how the roti and paratha making was going.  I would fib and say I tried and that my roti were not coming out round.  These white lies were just to make her feel better, because she felt her son was being taken care of if he was receiving fresh roti and parathas.

One day, I bit the bullet and tried.  I got over my preconceived notions and complexes related to roti and paratha making.  My first few attempts were pathetic, a real blow to my self-esteem.  I consider myself a decent cook and to fail so miserably at something so simple was embarrassing.  My roti resembled and tasted like cardboard and I hadn’t even dived into the world of parathas yet.  Thankfully, slowly but surely I got there and now I can confidently say that I can make roti and paratha.

This is not going to be a daily routine in my household though, a special biannual treat, if you will.  After all, I am still my mother’s daughter and I am glad she raised me how she did.

Aloo Parathay

Makes 4

Ingredients

for the dough:

2 1/2 cups Durum wheat flour, roti or chapati flour (I use Golden Temple)

3/4-1 1/2 cup of lukewarm water

for the filling:

1 tablespoon canola or vegetable oil

3 boiling potatoes, peeled and cubed into a medium dice

1/2 a red onion, finely chopped

1/4 cup chopped cilantro

a few leaves of mint, chopped

green chilies, chopped (as many as you like, I used 2)

1/2 teaspoon cumin seeds

1/2 teaspoon coriander seeds

pinch of ajwain (carom) seeds

red chili powder/cayenne pepper, to taste

crushed red chilies, to taste, optional

salt, to taste

canola or vegetable oil, for frying

Method

Prepare the dough by kneading the flour and water together.  Add the water a little at a time until the dough just comes together.  You may not need all of the water.  I knead by hand, but you can also do this in a food processor or stand mixer with the hook attachment.

Knead for about five minutes until the dough is firm yet elastic.  Place the dough in a bowl and dab on some water over the dough so it doesn’t form a skin and cover it with plastic wrap.  Let the dough rest for at least a few hours in the fridge or on the counter if you are using it the same day.

Once ready to make the parathas, let the dough sit at room temperature for a few hours if it was in the fridge.  The dough can be stored in the fridge for up to 3 days.

To make the potato filling boil the potatoes in some cold water in a pot on medium to medium high heat until the potatoes are fork tender and easily mashed, about 15-20 minutes.  Drain the water from the potatoes and mash them with a fork or potato masher.  While the potatoes are boiling, toast the cumin and coriander seeds in a dry fry pan on medium heat for about 5 minutes.  Transfer the spices to a mortar and pestle and coarsely grind them.

Next, add in the oil, onions, cilantro, green chilies, all the spices to the mashed potatoes and mix everything together. Set aside.

Now, you will have to roll out the dough.  Separate the dough into eight even-sized balls.  You will need two balls per one paratha.  Roll each ball out so that is is smooth with no seams.  Next, flatten out the ball with you hand so that it becomes a small circle.  Put your thumb at the center of the circle and press your fingers at the edges of the circle as to expand the circle.  Press your fingers all around and rotate the circle until it starts getting bigger.  At this point, use a rolling-pin to roll out a circle with a 6 inch diameter.  For each paratha you will need two 6 inch diameter circles.

Place 1/2 a cup of the potato filling over one 6 inch diameter circle, leaving an inch free all around.  Place the second dough circle on top and using your fingers pinch the edges shut.  Using your rolling pin, roll out the paratha until it approximately has a 10 inch diameter.

Heat your tawa, griddle, or frying pan to medium heat and place the paratha on the warm surface.  Let the paratha cook like this for a minute or two then flip it over and using a pastry brush, brush on about a tablespoon of oil on the top of the paratha.  Flip it again so that the oiled side is at the bottom.  Grease the top with another tablespoon of oil.  Once the bottom has turned golden brown, about 2-3 minutes flip it over and brown the other side.  Once both sides are golden brown remove from the heat and repeat the process until the dough is finished.

Serve with raita, achar, or green chutney.  I particularly like paratha with shami kebabs.

You all can’t even begin to imagine how excited I am for Eid (celebration at the end of Ramadan) this year.  Fasting this year was tough and there were rumors circulating that it might fall on Saturday depending on the lunar sighting.  As far as I was concerned, Eid was to be on Friday no matter what the council of whoever decided.

Most of this Ramadan was spent at my in-laws.  I previously mentioned how they are all about food.  Somehow my mother-in-law manages to spend the whole day cooking in the kitchen even though everyone is fasting.  Let me tell you, I have eaten my fair share this month.

My Mother-in-Law stirring away

If I am going to resort back to my previous eating habits I might as well end my over consumption  with a great bang.  One last hurrah, if you will.  I asked my mother-in-law to share her recipe for sooji ka halwa (semolina dessert with cardamom, nuts, and green raisins).

Growing up we would eat this on Eid and on other religious holidays.  A taste of this halwa brings me back many childhood memories of Eid and summers in Pakistan.  Halwa is usually eaten with pooris and chanay.  Pooris are a decadent treat that brings the indulgence of halwa to another level.  When you buy pooris from the market stall they soak the paper bags and newspaper with oil.  Hmm, I might just eat my halwa with a spoon.  On the other hand, halwa without poori, poori without halwa, whichever way you look at it something is missing.

My mother-in-law was quite excited for me to make this with her and also that I would be posting it.  She can make anything Pakistani and it most surely turns out to be absolutely amazing.  She doesn’t even trust me in the kitchen, partially because I cut corners where oil, butter, and ghee are concerned and she is never satisfied with food unless it is made by her.  If I help her in the kitchen my position is reserved for chopping onions and assembling her mise en place.  I have learned a great deal by watching her cook on our visits to my in-laws.  I might use less oil or whatever but, the main concept of sharing a recipe and learning from others is there, something that is priceless.  I have added new dish to my repertoire, a dish of tradition that I can share on upcoming Eid with others.

Eid Mubarak!

Sooji ka Halwa (Semolina Dessert with Cardamom, Nuts, and Green Raisins)

Serves 4-6 (servings here are relative, it could serve 8 if only having a small quantity)

Ingredients

1 1/3 cup finely ground semolina, sooji found in Indian-Pakistani grocers

1 1/3 cup sugar

1/4 cup canola oil

4 tablespoons unsalted butter

5 green cardamoms, slightly crushed

2 cups water

1/3 cup toasted slivered almonds (can use whole almonds with skin and sliver them), plus extra for garnish

1/3 cup green raisins or sultanas, plus extra for garnish

3-4 drops of kewra water or rose water, optional

a few leaves of edible silver leaf, warq (we couldn’t find it, thus did not use it)

Method

Heat a wide pan on medium heat and add 2 tablespoons of butter and the oil and drop in the cardamom pods and allow the aroma to infuse the oil for about 2 minutes.  Add in the semolina and stir the oil with the semolina so that it absorbs and becomes dry.

Keep stirring every 30 seconds until the semolina until the color changes and you smell the fragrance of slight roasting.  Roast until light brown, about 7-10 minutes and then add the remaining 2 tablespoons on butter and allow it ooze and melt into the semolina.  Remove the pan from the heat and add in the sugar and mix until combined.

Next, stream in the water and return to the heat (increase the heat to medium-high) and keep stirring until the semolina thickens, about 5 minutes.  When it has thickened reduce the heat to low.  Add in raisins, almonds, and the few drops of kewra water (if you are using it).  The consistency should be that of a thick porridge or oatmeal.  Garnish with the silver leaf, raisins, and almonds.  Serve warm or some like it chilled.  For a real treat serve with pooris.

*optional-you may infuse the oil with a few strands of saffron if you like.

I know you all are probably sick of hearing, “here’s another unique zucchini recipe for you.”  I am.  I’ve had enough frittatas, galettes, and zucchini bread/muffins/cookies, you get the picture.  Maybe you are even tired of eating zucchini, it is after all September!  Despite all of this, I’m going to throw another zucchini recipe at you.  It’s super quick, easy, flavorful, and all of those other clichéd adjectives.

Plus, it is economical.  I feel as though I sound like a food personality full of gimmicks.  Trust me, I am not and I just want to share this dish with you all.  Sometimes, my mind goes out of the practical zone and dreams of buying caviar, foie gras, fine cheeses, truffles, and the like.  Then, I snap myself back to reality and remember that I am not working (yet!) and my husband is an overworked and underpaid medical student.

Pakistani food doesn’t break the bank for us.  When I’m trying to budget (which, is rarely successful) I proclaim that I am only cooking Pakistani food.  The spices are reasonable if you buy them at a Pakistani or Indian grocer and the other ingredients are basic pantry staples.  This dish would be even more economical if you have a garden and it grows copious amounts of zucchini.

I love how the zucchini in this dish gets almost caramelized with the onions and tomatoes, creating an almost chutney-like consistency.  You can use this recipe as a template for many other vegetables: eggplant, okra, potatoes, green beans.  I serve this dish with a huge spoonful of yogurt, the yogurt mellows out the spices and adds creaminess.  Whether or not you are sick of zucchini,  the spices in this dish will revive your passion for late summer produce.

Pakistani-Style Zucchini

Serves 3 as a main, 4 as a side

Ingredients

2-3 tablespoons canola oil, or any other neutral-flavored vegetable oil

4 medium-size zucchini, peeled and cut into thin half-moons

1 red onion, thinly sliced

2 ripe and juicy tomatoes, chopped

1 teaspoon ground cumin

1 teaspoon ground coriander

1/4 teaspoon ground turmeric

1/4 teaspoon red chili powder, or to taste

1/4-1/2 teaspoon crushed red chilies, or to taste

1 teaspoon salt, or to taste

juice of 1/2 a lime, optional

1-2 sliced green chilies, for garnish

10 springs of cilantro, chopped, for garnish

Method

Heat the oil in a large pan on medium heat, add the red onions and allow them to cook until they just begin to lightly turn brown, about 5-7 minutes.  At this point, add in the tomatoes and stir with the onions for 2 minutes.  Then, add in the spices and cook the rawness out of the spices.  Next, add in the zucchini and mix for 5 minutes.  Cover the pan and allow the zucchini to cook for an additional 20-25 minutes until the zucchini wilts down and the oil begins to separate from the zucchini.  Squeeze on the juice of the lime and garnish with the green chilies and cilantro.  Serve with roti, chapati, or naan.

Nights when I’m lazy and don’t know what to make I always turn to Pakistani food.  I don’t have to think about it and it just comes naturally.  Even though seekh kebabs might be daunting for some, they are so simple and you don’t need a hoard of ingredients for them as is the case with most Pakistani dishes.

I am not creative with Pakistani food or add my own twist to it.  I keep it as it is, in my mind it needs no alterations.  There have been occasions when I see people, bloggers and others who add something to a Pakistani dish and make me think, “not such a great idea.”  Yes, I know food is relative to each person and flavors are as well.  But, somehow I can’t bring myself to do it.  Plus, no need for me to be judgmental when I probably corrupt other cultures’ food to no end.  This makes me recall my recent trip to Marrakech, I told the cooking instructor, Lala Nazha, that I add nuts and herbs and dried fruits to couscous and she sort of looked at me with disdain, sort of like, “that’s not authentic.”

Seekh Kebabs are usually something you eat at a tandoori restaurant, but here in Kingston I don’t have any Pakistani restaurants and have to fend for myself.  Well, there is one, but my husband tried it before I moved here and said it’s not good, so I’m taking his word for it.  I usually get my fix when I visit my in-laws in Toronto because if you can say one thing about them, it is that they LOVE to barbecue.  (Of course that’s not the only good thing to say about them.)  When I say LOVE, I mean the strongest form of the word.  Chicken tikkas and seekh kebabs (beef) are served by the tray-ful, full of smokey charcoaly flavor.  Plus, my in-laws’ food is so good that they don’t like any Pakistani restaurant in Toronto.  I recommend some and then they never like them.  Their standards are quite high.  If I cooked like them, I wouldn’t need restaurants either.

Usually, I make my seekh kebabs out of chicken, mainly for the health reasons.  Authentic beef seekh kebabs have a great deal of fat.  Extra fat is added into the meat grinder, just so they stay moist.  I use ground chicken, but if you have a meat grinder, by all means by whole pieces of boneless white and dark meat chicken (or beef) and grind the spices and vegetables/herbs all together in the grinder, sort of like making a sausage.  These kebabs are amazing with naan, green chutney, and salad.

Chicken Seekh Kebabs

Makes 7-8 Kebabs

Ingredients

1 pound ground chicken (white and dark meat), or ground beef

1/4 yellow split peas (roasted on a dry pan until they start to become slightly browned and slightly cooled, then ground in a spice grinder)

1/2 a red onion, chopped

1/2 a cup packed cilantro, chopped

10 mint leaves, chopped

2 green chilies, chipped finely (use less or omit seeds for less spicy)

2 cloves of garlic, chopped finely

2 inch piece of ginger, grated finely

1 tablespoon garam masala (freshly ground, if possible)

2 teaspoons cumin powder

2 teaspoons coriander powder

1/2 a teaspoon red chili powder, or to taste

1 teaspoon salt, or to taste

some canola oil or butter for basting the kebabs

Method

Combine all the ingredients, except the oil in a food processor (or by hand) and pulse until well combined, about a minute or two.  When combined, form the meat into approximately 6 inch sausages, not too thick though.  If you have thick metal skewers use those and form the meat onto the skewers.  The skewer method will only work on an outdoor grill.

If you are able to let the kebabs marinate with the spices for at least an hour before cooking.

Cook the kebabs on a grill pan on medium heat (or outdoor grill) for about 6 minutes per side, or until completely cooked through.  While cooking, keep basting the kebabs with butter or oil, so that they develop a sheen or glisten.

*If your meat is very lean add some oil or melted butter so that the meat does not dry up when cooking.

*Wet your hands with water while shaping the kebabs, this way the meat won’t stick to your hands.

*As many of you know Pakistan has been ravaged by floods, the international response is severely lacking and innocent people are suffering.  Hold back any preconceived notions you may or may not have about Pakistan and look at the human suffering that is occurring there.  Please donate, many organizations are taking funds.  My family has gone through Unicef.

Also, see Shayma’s (The Spice Spoon’s) poignant call for help here.

Pakistani street-foods are the ultimate in sweet, salty, and sour deliciousness.  I am a huge fan of chaat and when I miss the taste of chaat I usually opt for this version with potatoes and chickpeas.  In these hot summer months, it’s the perfect light snack.  The temperature is scorching hot and I feel so very lethargic that I just want to  make something easy.  I no longer have the patience to stand in front of the stove and sweat, even in air conditioning.

I last went to Pakistan for my wedding shopping, I haven’t been back since due to schedules and the like.  But, the thing I miss most, besides family, of course, is the street food.  My mom, my aunt, and I went crazy during my wedding shopping, getting my bridal dresses, jewelry, and the various other outfits.  Despite all the rush and chaos, we could calm down with a bowl of chaat practically everyday.  Sitting on a rickety chair with an even ricketier table at a street vendor, we would just relax with our chaat.  The scorching sun in the market, the pollution from traffic and rickshaws, the fan that was blowing around hot air didn’t even phase us.  It was our time to unwind.  Let me tell you, wedding preparations are stressful.

Now that I’m way beyond my newlywed days and back to reality, I have the responsibility of making the chaat.  As we have established before my husband is good for nothing in the kitchen.  Thankfully, chaat is simple and pantry-friendly.  I always have potatoes and chickpeas on hand.  I don’t think my household would run without them.  The tamarind chutney adds the right amount of tang.  I love tamarind, I love tamarind candies coated in chaat masala.  I am salivating just thinking about them.  (You can get similar candies in Mexican/Latin American grocery stores).  My chutney recipe isn’t 100% authentic because I make mine in 5 minutes.  The real version is slowly simmered on a stove all day and I haven’t learned how to make it yet.  My shortcut chutney is just fine for the time being.  Chaat is a nice departure from usual summer fare and could also be considered a salad of sorts.  You don’t even need to go to Pakistan to try it, but I must admit, even though mine is pretty tasty, it is not even close to Pakistani chaat.

Potato and Chickpea “Chaat” with Tamarind Chutney

Serves 3

Ingredients

2 cups cooked chickpeas

1-2 medium-sized potatoes, boiled until tender and then peeled and cut into a small dice

1/2 a medium-sized red onion, finely chopped

1 long green chili, finely chopped (seeds and ribs removed for less spicy)

1 tomato, finely chopped, optional

1/4 bunch of cilantro chopped (use as much as you like)

a few mint leaves, optional

chaat masala, (as much as you like, I like to add a lot, about 1 tablespoon, you can find it in Indian/Pakistani grocery stores, I use Shan brand)

for the Tamarind Chutney:

2 heaping teaspoons of tamarind paste

juice of 1 lime

1/2 teaspoon cumin powder

1 teaspoon chaat masala

1/4 teaspoon red chili powder (as much as you like)

1 tablespoon raw sugar

Method

First, make the chutney by combining all the ingredients for the chutney in a small saucepan on medium heat and melt the tamarind until it becomes liquidy, about 5 minutes.  If your chutney is thick, thin it out with some water.  Chill for an hour.

Next, combine all the ingredients for the chaat; the chickpeas, potatoes, red onion, green chili, tomatoes (optional), cilantro,  mint (optional), and chaat masala.  Check for salt.  I don’t add salt because the chaat masala already has it in it.  I got ahead of myself and mixed in the tamarind chutney with the chickpeas, usually I just drizzle some on top of the chickpeas.  If you would like you can mix the chutney in with the chickpeas as I did here.  Chill the chaat for an hour in the refrigerator.  Some people like to drizzle on thinned out yogurt on top as well.  Garnish with cilantro leaves and a sprinkling of chaat masala.

Chickpeas